Shelf auditing in Assist allows you to check materials for discrepant statuses. This makes it easier to clean up the material collection so that the materials on the shelf match the information in the library system.
The feature is accessed via the "Logistics" item in the bottom menu.
Start scanning
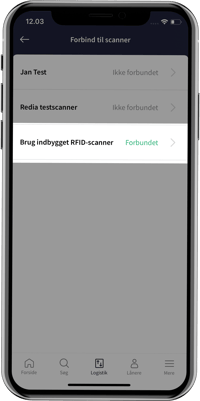
To start scanning, Assist can be connected to an external RFID scanner, e.g. Scanner. If the library has multiple external scanners, they will appear in a list where the desired one is selected.
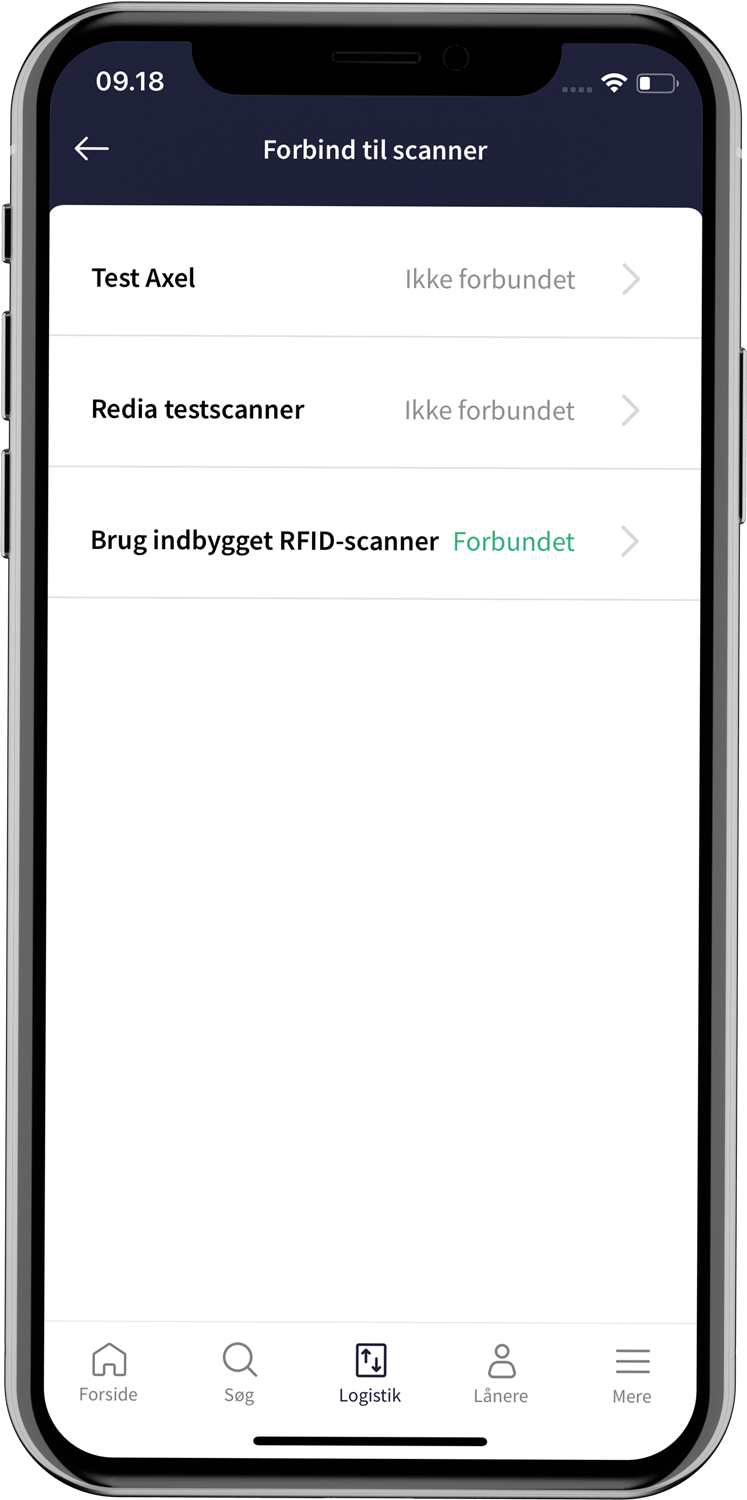
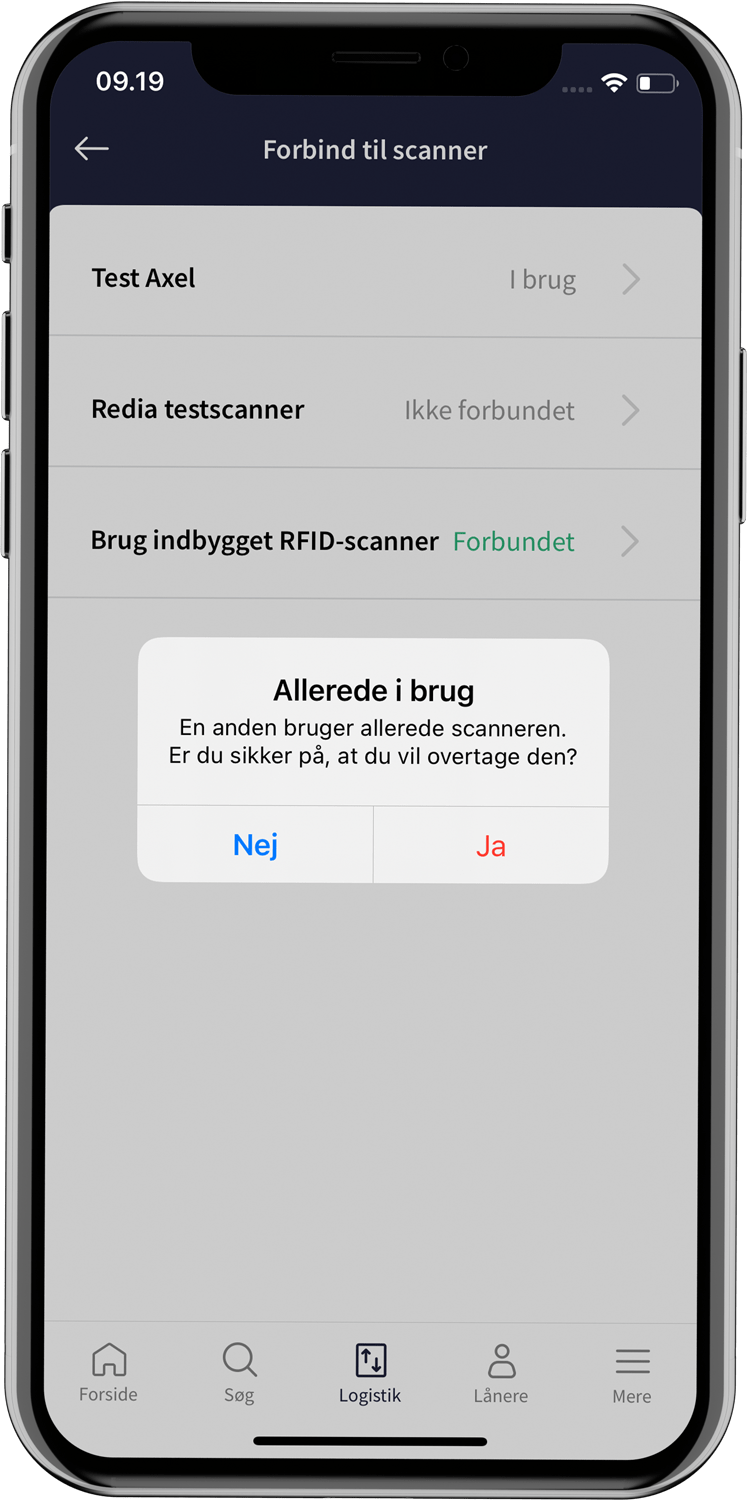
If the scanner is used by another user, it will say "In use" next to it. However, you can still select the scanner.

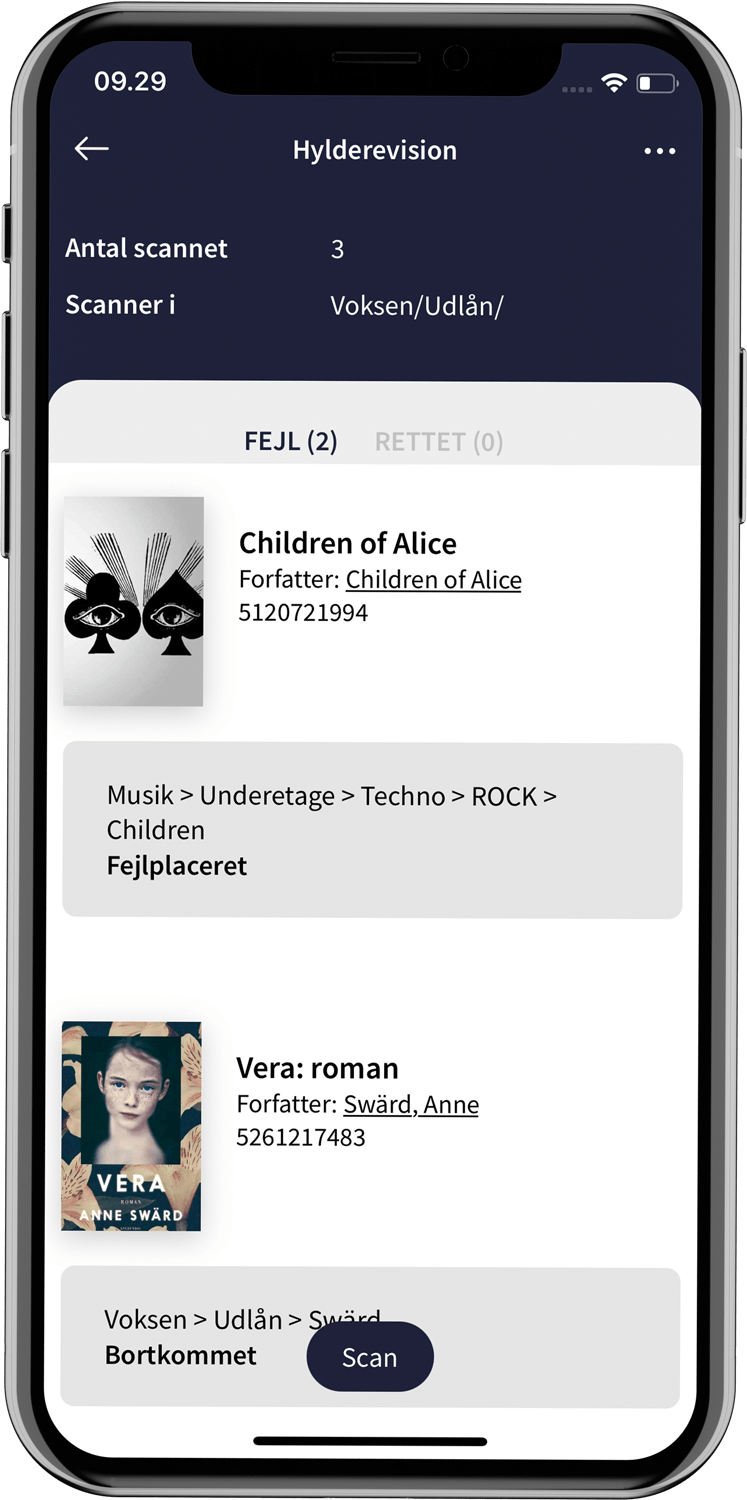
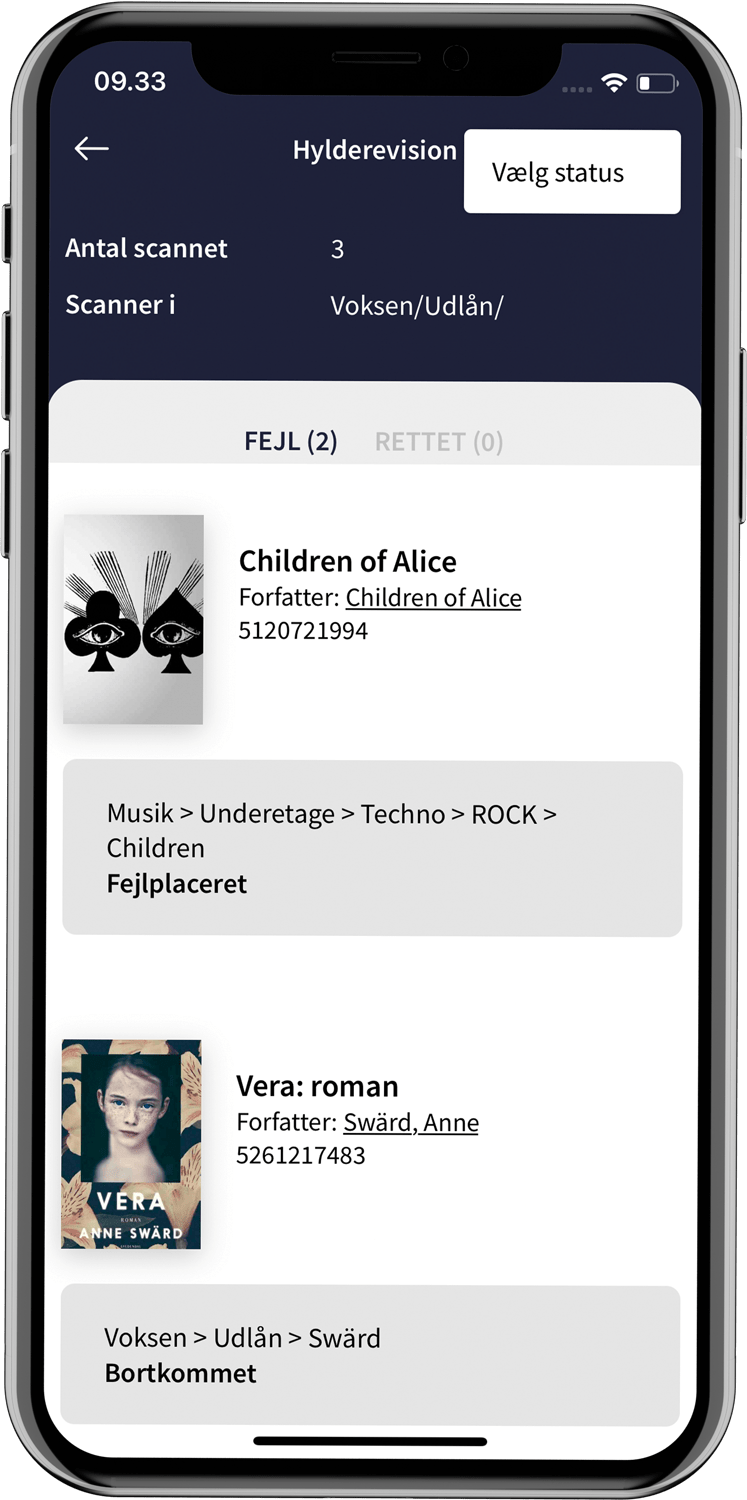
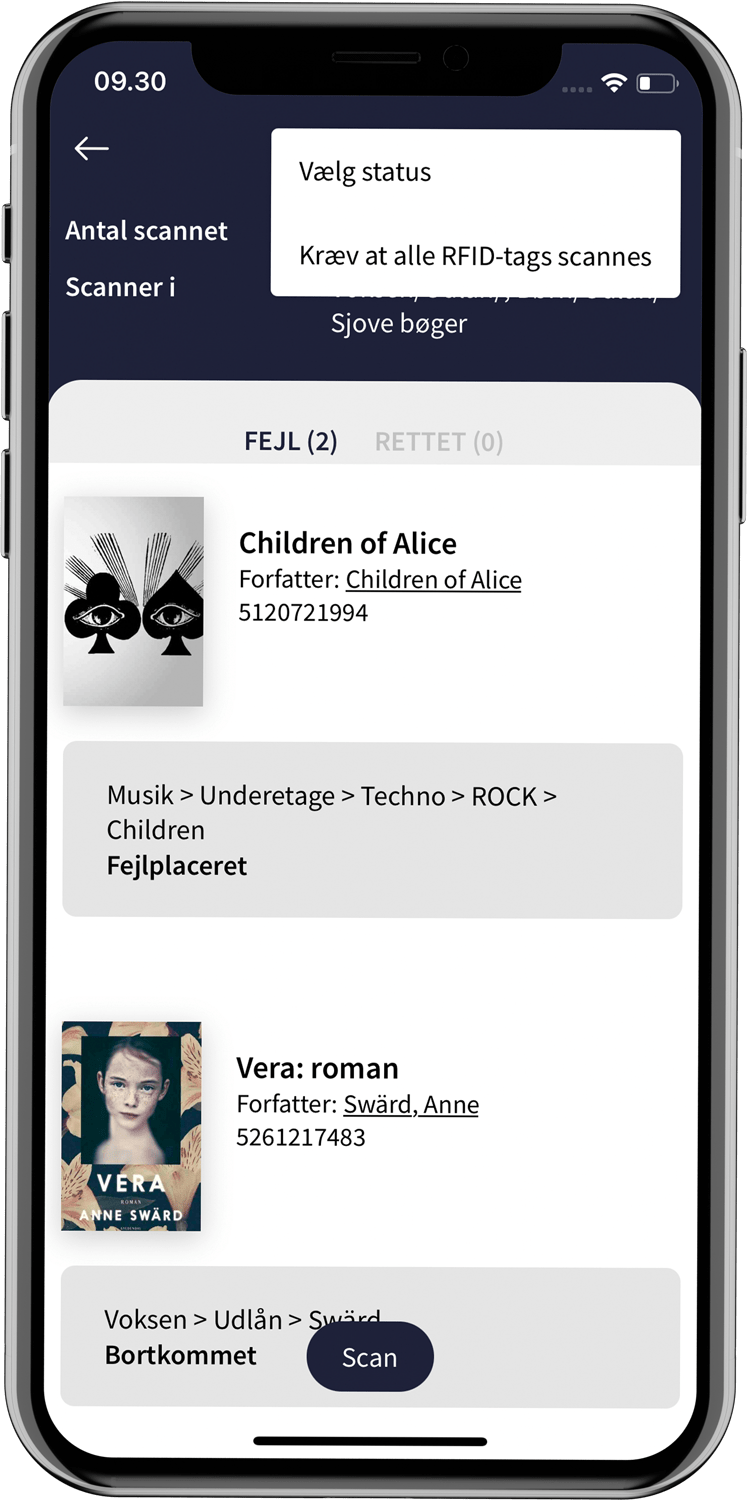
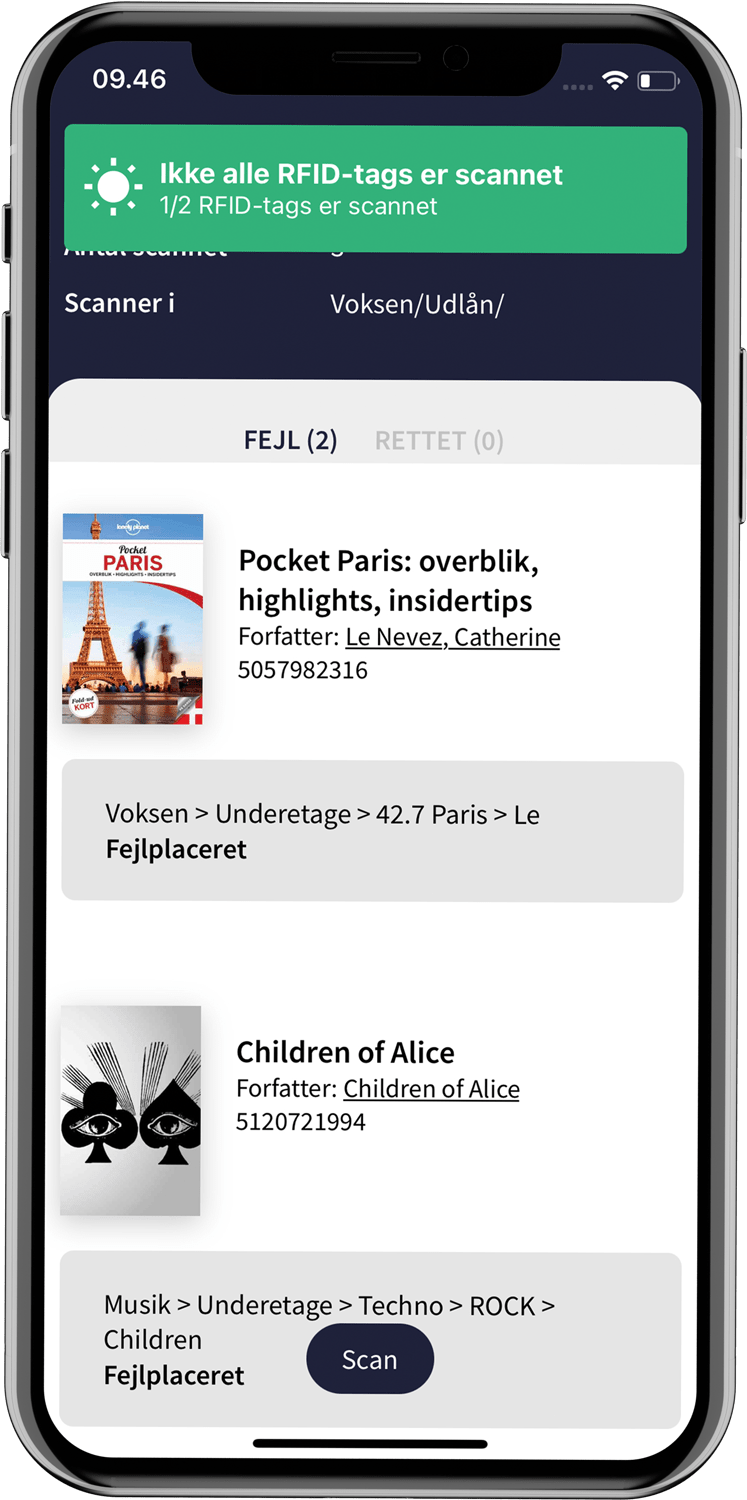
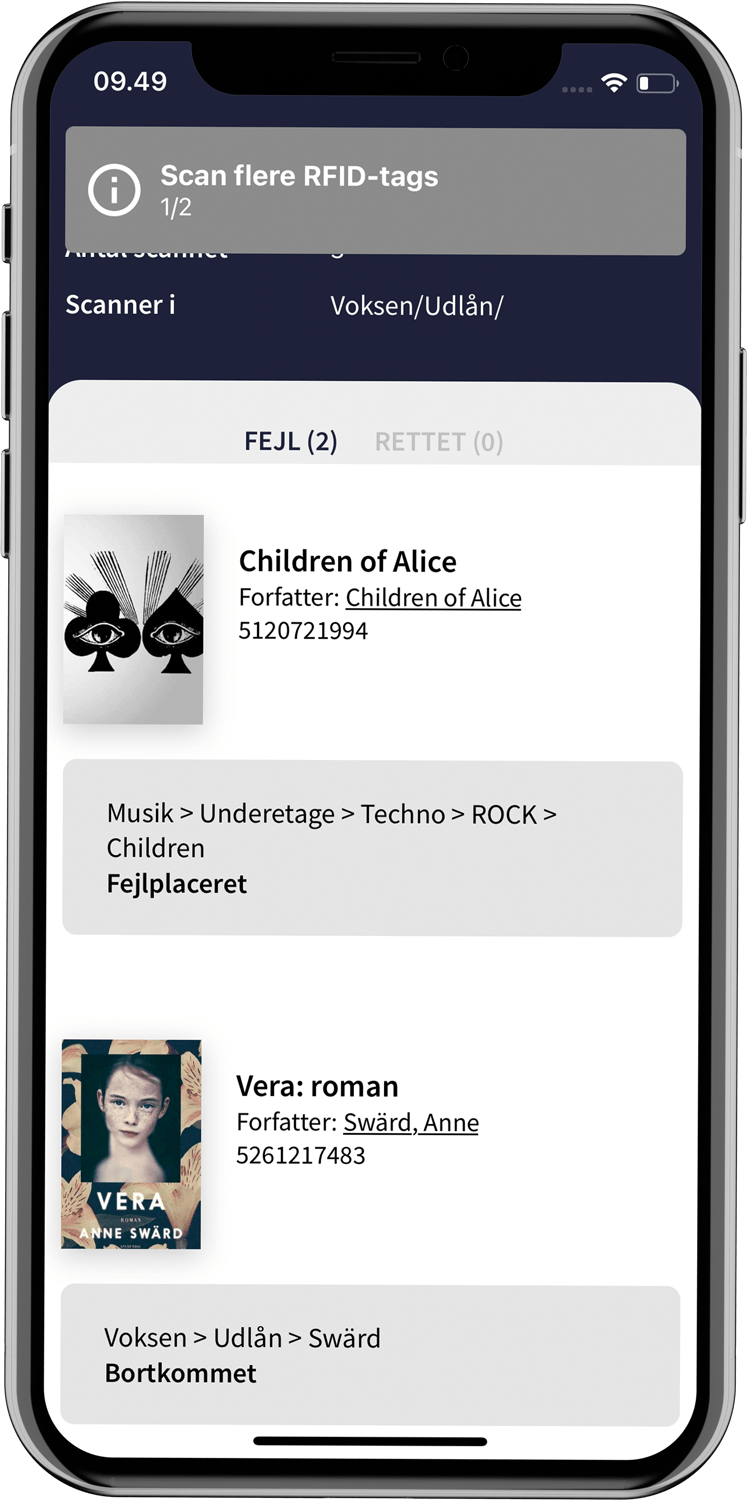
The selected area will be scanned with the external scanner and materials with deviating statuses will be registered in a list in Assist. Once an area is scanned, you can find the materials like in a pick list and then correct the errors. At the top, you can see the total number of materials that have been detected regardless of whether they had errors or not.
Placement
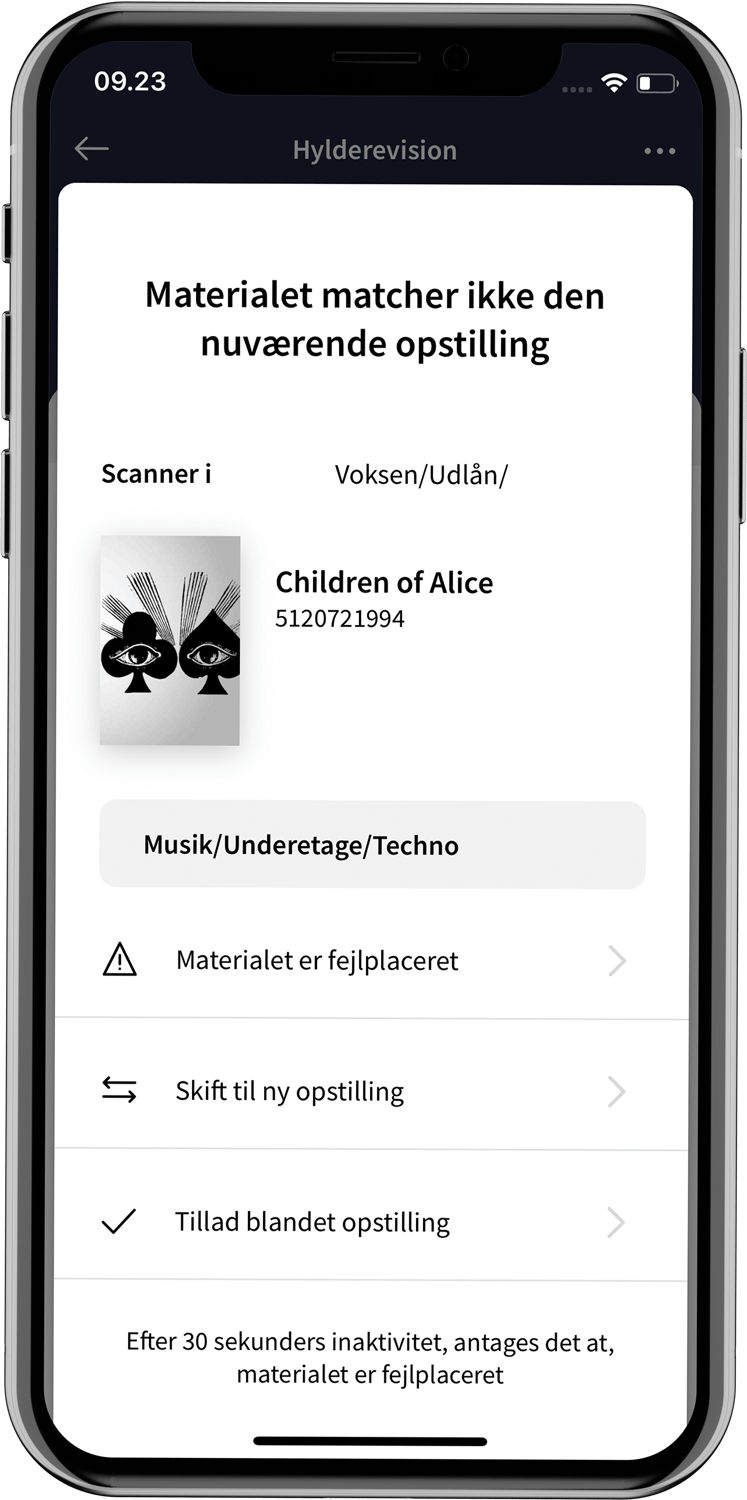
When the first material is detected, Assist picks up its location and displays it at the top of the screen. This allows you to make sure it scans in the expected area.
If a material is detected with a different location than the one Assist assumes you are in, a message will display it. The message clearly shows which material it is and what location it is in. You can then assess whether the material is misplaced or not. You have three options:
- Material is misplaced: The material will appear in the list of materials with deviating statuses.
- Change to new layout: The item is correctly placed as you have started scanning in a new area. The location at the top will change to the new location.
- Allow mixed lineup: The item is correctly positioned as it is in an area with mixed lineup groups.
If you do not make a selection, after 30 seconds of inactivity Assist will assume that the item is misplaced and it will be added to the list.
Status
The list of registered materials is split in two. Under "Errors" are the materials that must be handled manually. Under "Corrected" are materials whose statuses do not require further handling. They are automatically updated in the library system.* If the material has both an error status and a corrected status, the material will appear on both lists.
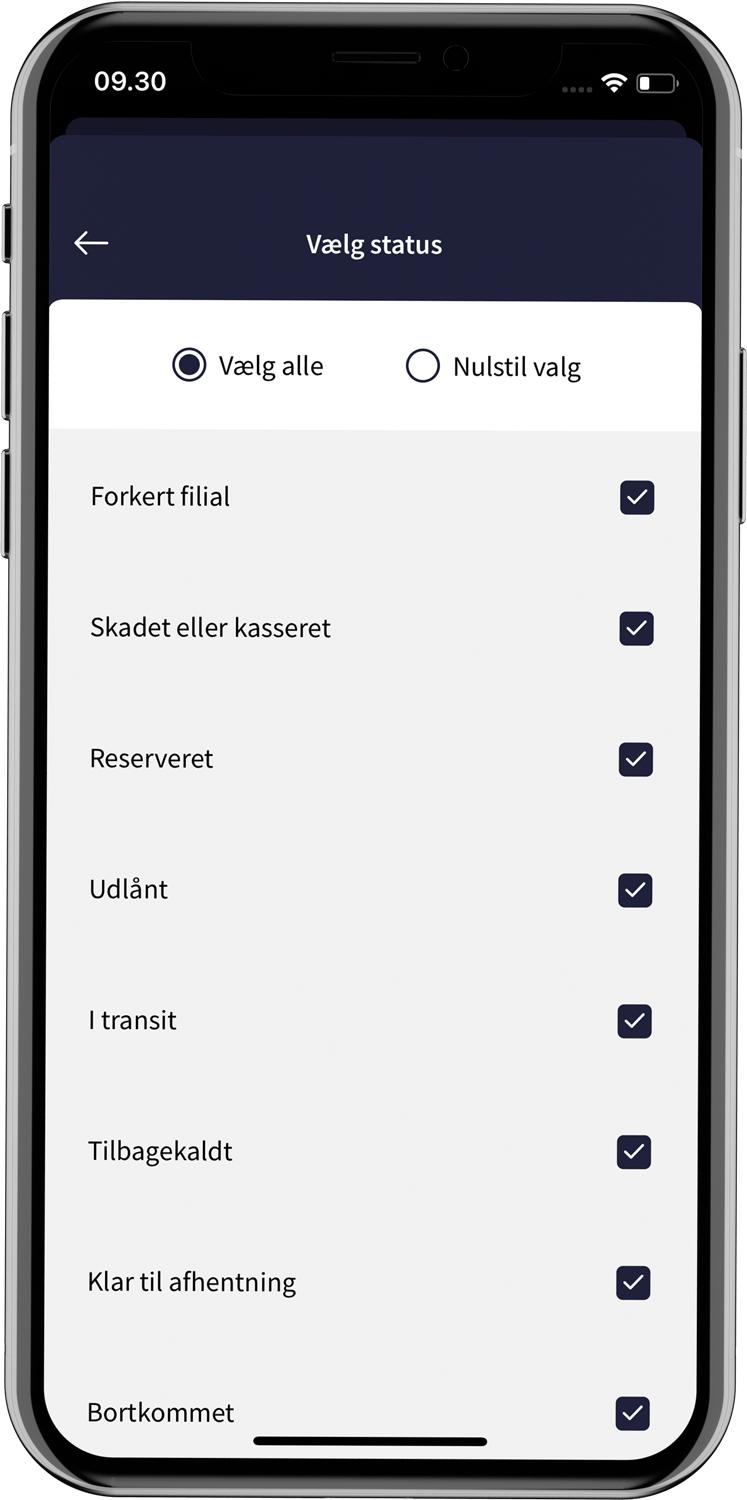
Under the three dots in the top right corner, you can select which statuses are shown in the list in Assist. The statuses originate from the library system.
* Depends on the library system
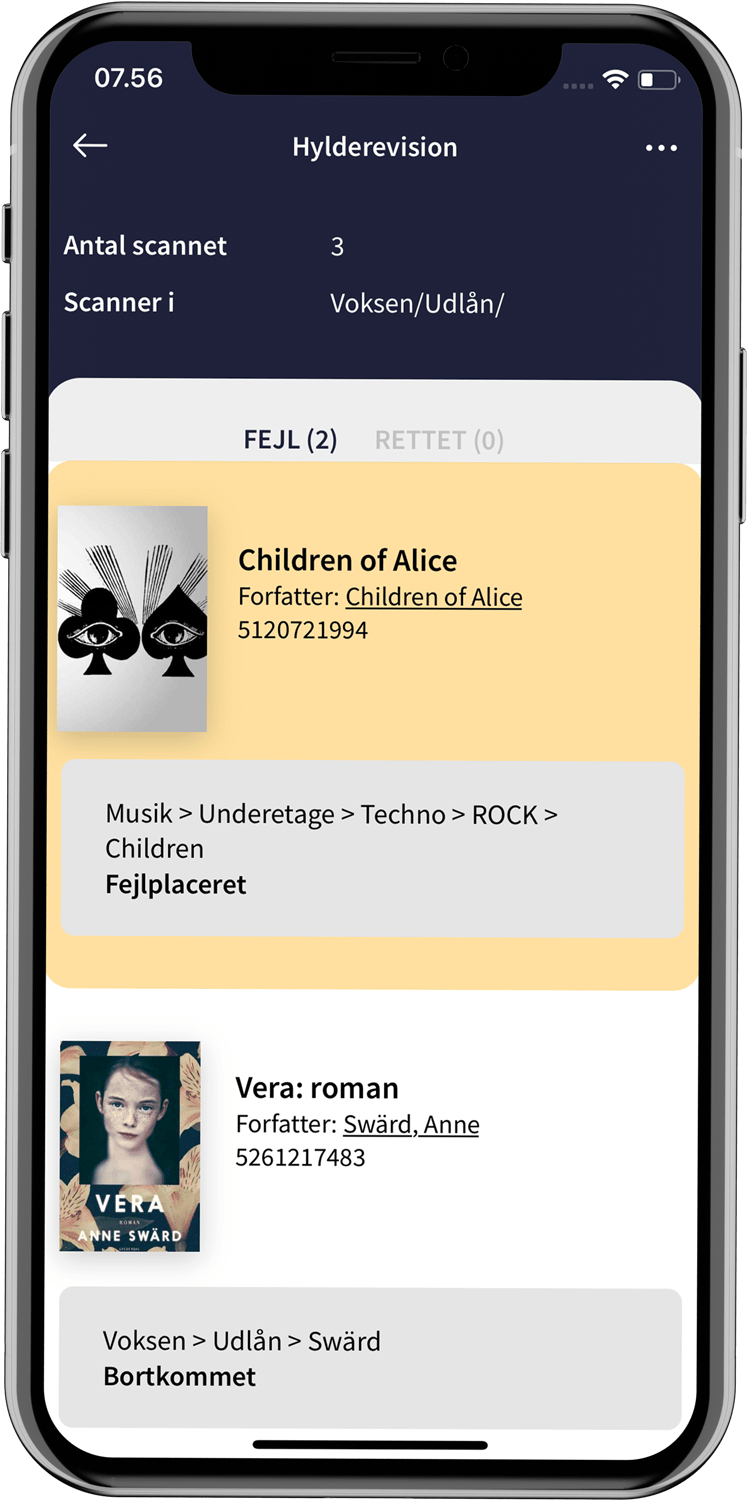
Localize material
If the external scanner detects a material that is already registered under "ERROR", the material in the list will be highlighted with a yellow color that will be displayed for five seconds. This allows you to narrow down where an error-detected item is located on the shelf. However, the range of the antenna on the external scanner means that the area can still be quite large.
Use the built-in RFID scanner
It is possible to scan materials individually using the device's built-in scanner. Select it from the list of RFID scanners and scan materials one at a time. The behavior in Assist is the same as when using an external RFID scanner.
Scanning materials with multiple tags
When using the built-in RFID scanner, you can choose whether all tags in a material should be scanned before the material is registered or whether it is sufficient for only one tag to be scanned.
In the menu (top right corner) you can turn the function on and off:
- Do not require all RFID tags to be scanned: Scan a tag in the material and the material will be registered. .
- Require all RFID tags to be scanned: Scan all tags in the material before it is registered.
When the function is opened, it is set to "Do not require all RFID tags to be scanned". The menu shows the other option than the one currently enabled, i.e. if the menu says "Require all RFID tags to be scanned", it is actually the "Do not require all RFID tags to be scanned" function that is enabled.
Regardless of which function you have enabled, a message will show how many tags the scanned material contains, even if "Do not require all RFID tags to be scanned" is enabled. This makes it possible to check if the material is complete by examining it without having to scan all tags, if that is what you want.
The message is green, indicating that the required number of tags have been scanned for the material to be registered correctly, and counts up the number at the top of the screen.
If you select "Do not require all RFID tags to be scanned", the message is gray until the last tag is scanned, after which the message turns green and the material is registered.
Exit
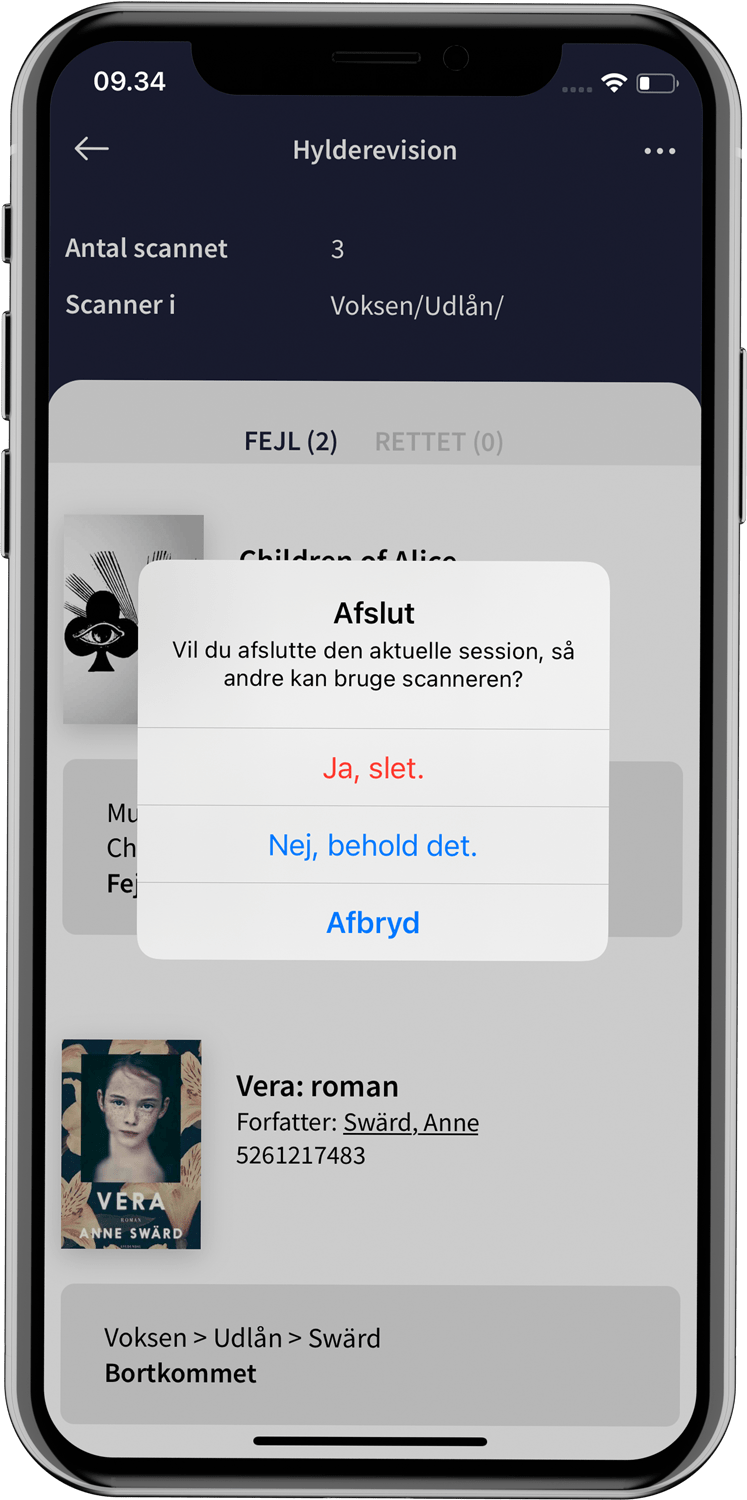
To exit the function, press the back arrow in the top left corner. There are three options for ending the session:
- Yes, Delete: The list will be deleted and the Scanner will no longer appear as "In use" to other Assist users.
- No, keep: The list of registered materials will be saved, so the next time you open the function, the list of registered materials will be displayed. For other Assist users, the Scanner will still appear as "In use" even though it is not actually being actively used.
- Disconnect: The session will not be terminated and the feature will remain open.